 This page is under construction This page is under construction |
This page contains various tips and information regarding combat in S.T.A.L.K.E.R.: Shadow of Chernobyl. If you've played alot of games, first-person shooters especially, then the information on this page should be common knowledge, but for the sake of completeness of the Zone Survival Guide I've decided to provide a few hints for the rookie stalker.
Make sure you have all the relevant actions bound to keys near your primary keyboard hand - I personally use the keypad because it gives me many keys in easy-to-find places - and I can use the nearby keys (Ins, Home, etc.) for secondary actions. Whatever you prefer, make sure the most important ones are easy to reach - this includes keys for sprinting, crouching, and for using bandages and medkits.
Pick your fights if you can - there is no need to gun down every bandit, mutant, animal or enemy in the game. You can if you wish to, obviously, but you actually can avoid alot of fighting. There are many places where you will be forced to fight - the Agroprom Underground, for example is extremely tricky to go through without fighting since you'll encounter resistance in a very narrow space. However, in many of the outside areas you'll eventually learn where eg. bandits and mutants tend to end up, and with that in mind you can usually just move around that particular area - and if you should come under attack, sprinting away can often get you out of the situation without a single scratch.
You will often find that you have time between firefights - in other words, you choose to pick the fights, not your enemies. This is not always true, but for most parts it is. This also means that you have time to prepare yourself for the next encounter. Remember to reload your weapons and heal up. For the last part you can often save medkits, bandages and antirads by bringing some artifacts that speed up the healing process, reduce bleeding and remove radiation; this is of course only if you're a patient player, but if you're low on supplies this can be a good way to ration your equipment.
Go for headshots if possible. Basically all the enemies in the game will go down alot faster if you shoot them in particularly vulnerable areas - and this esentially boils down to the head. Sometimes you may not really have time to aim precisely, but if you can move the crosshair towards the head while spraying bullets, you may often land a fatal headshot. Scoped rifles makes it easier to land headshots but this often does require that you have some time (and distance to your target) to patiently setup for a headshot or two. The sniper rifles are obviously ideal for this due to their improved scopes, accuracy, and damage.
Remember that S.T.A.L.K.E.R.: Shadow of Chernobyl has a fairly realistic physics simulation - and this includes physics for bullets. Especially when sniping at enemies far away, you'll notice how bullets are pulled by gravity. This means that for you to land a headshot, you often need to aim above the head. This does takes practise but once you've tried it a couple of times you'll soon get the hang of it... and eventually you'll be able to judge distance precisely and land headshots almost every time. You may also find help in the different scopes as they have markers in the center of the scope, and below. The markers below can be used as a reference when sniping at long distances - however, it will again take practise to learn exactly which marker you should aim with in different situations.
Although it can be hard to use strategically, do remember that many bullets will ricochet - whether it's off dirt, tarmac, or other types of surfaces. This can be handy in some situations, although only some rare ones. The gate at the hangar in Garbage close to the bandit strongpoint is an example of a place where I've been able to utilize this. It's hard though, but nice if you can actually bag an enemy by shooting at the ground, landing your shots on someone behind partial cover.
Use your equipment, but do save for a rainy day. There is no idea in having 3 SEVA suits stashed away while you're running around in a worn-out Stalker Suit. Why stick to the Fast-Shooting Akm if you've found a scoped TRs 301 or a Vintar BC? Sure, some of the equipment you use may simply be because you like it, and that's fair enough... but if you have spare armors or better weapons (or the same weapons but in better condition), be sure to use them. The same goes for artifacts - save the best ones and only sell them if you find more than you can really use. There is no need to have three anti-bleeding artifacts if one does the trick. Healing artifacts are a bit different since it can be nice to have eg. more than one Soul so you can heal up alot faster.
Save for the future. If you find some rare ammunititon possibly for a gun you haven't even found yet, save it. Some of the ammunition is somewhat rare (some is very rare), so keeping it and stashing it away may help you in the long run; ammunition can also be quite expensive, so this is another reason to hide it away rather than selling it. An example is the 9x39 mm type of ammunition that is very rare during the earlier stages of the game; the ammunition is used by both the Tunder and the Vintar BC, both excellent rifles in their own right.
Use cover. Use the right type of cover. And use the lean buttons. The best type of cover is obvious hard cover that has you covered from top to toe - if you stand eg. behind a train car, you feet and parts of your legs will be exposed and you'll be in a vulnerable position. The same goes for enemies in these places of course, so if you have a chance to shoot someone in the leg, go for it.
If your weapon has more than one firing mode use them in different situations. If you're in close combat, full auto or 3-round bursts may be your safest bet since you can hand out alot of bullets in a short time. For longer range combat, single shot mode is likely the most effective as a single shot won't ruin your aim in the same way a burst will. Full auto at semi-long range can be viable - but it depends on the accuracy of the weapon. If it's too inaccurate, you're likely to end up wasting alot of ammunition taking down a single enemy.
If you have a hard time spotting enemies, especially if they're partially or fully concealed by soft cover (eg. vegetation) remember that your binoculars has a tracking function that points out all the visible targets in view - even those behind soft cover. Furthermore, the binoculars will also indicate which targets are friendly (green), neutral (white/yellow) and hostile (red). The binoculars can also just be a great tool to scout out an area before you move towards it. Remember that you can also zoom in and out with the binoculars.
Use elevated areas for an attack if possible. NPCs can't climb ladders so places like this are often safe in the sense that enemies won't sneak up on you. However, this only goes for ladders - NPCs have no problems scaling stairs
In many areas of the game you'll come upon various barrels. Some of these are red - and they indicate barrels that can explode. All you need to do is shoot them a couple of times and they will in fact blow up. These red barrels can be useful in different situations. First off it's pretty obvious that if there are enemies near such a barrel, shooting the barrel may not only severely injure them but some of them are likely to go down as well; the video on the right side demonstrates this. The second use is for taking down a neutral (or friendly) person without them, or their faction, getting hostile towards you; since the barrel effectively kills the person. This video explains this neat trick in detail.
Grenades are quite useful in a number of different situations - you can use them simply as an offensive move, or you can use them to flush out enemies since they will try to move away from any grenades you throw at them. In any case, during the playthrough of S.T.A.L.K.E.R.: Shadow of Chernobyl you'll come upon alot of grenades - if you do decide to pick them up, remember also to use them. There is no point in having 10 grenades weighing you down if you're not going to use them. As mentioned earlier, S.T.A.L.K.E.R.: Shadow of Chernobyl does incorporate physics which means that thrown grenades will roll and bounce, and thus can be hard to land accurately. However, the physics also mean that you can bounce grenades off walls and obstacles which can be handy in different situations.
Per default you can throw grenades by selecting them (default key: 4) and then clicking the left mouse button to throw them - this will facilitate a basic, medium length throw. However, you can also use the right mouse button to select the strength of the throw; hold down the right mouse button and an indicator will pop up at the center of the screen; the longer you hold down the mouse button, the further the indicator will go - and the stronger the throw will be. Don't worry about holding down the button too long - your character will hold the pin so there is no chance of the grenade exploding in your hand. Refer to the video on the left for some examples of the default throw, and some selective strength throws; the final throw in the video demonstrates the fact that you can hold down the button for as long as you'd like; the grenade will not go off in your hand.
Although not a full-blown stealth game, S.T.A.L.K.E.R.: Shadow of Chernobyl does implement a fairly realistic sound and detection scheme. This not only means that enemies may detect you based on the amount of noise you make, but also means that you can perform silent kills.
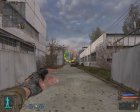
In the lower, left corner of the screen you can find the sound, stance and visibility indicator. The indicator shows you the amount of noise you're making, your stance (ie. if you're crouched) and if you're visible to enemies.
I am not entirely sure how it works, or rather which will function as cover, but usually most types of foliage can conceal you. I've often opened fire on enemies while staying near the "shrubbery" close to trees, for example, and often the enemies would slowly move towards me as if they didn't know exactly what was going on or where I was located. This also goes for pine trees, that allows you to hide close to them.
|

 Proper key bindings

 - @dawnrazor73